design Kitchen and Kitchen Set
Therefore, no wonder if the current split in two kitchens, kitchen, wet and dry kitchen, which has a different function. The kitchen is usually combined with a living room or dining room is often referred to as the kitchen pantry or dry. This room is usually equipped with modern kitchen equipment. Meanwhile, wet kitchen used for cooking. Wet kitchen is more widely used to heat the food before serving or used to cook something practical, that if using the spices they had half-finished. Therefore, now the middle of the kitchen design trend in line with the times.
http://architectaria.com
Ferrari World Theme Park
Dubbed 'Ferrari World Abu Dhabi', the new holiday destination will be the world's first Ferrari theme park and the largest attraction of its kind.
The theme park will feature an iconic sleek red roof that's said to be directly inspired by the classic double curve side profile of the Ferrari GT body, spanning 2,152,782 square feet and carrying the largest Ferrari logo ever created.
There will be a number of attractions, including rides for children of all ages and the world's fastest rollercoaster, travelling at speeds exceeding 124 mph. Another ride will rocket passengers through the roof and to a height of 203 feet to simulate the G-forces experienced by drivers in an F1 car.
The site is located on Yas Island on the North East side of Abu Dhabi's mainland, which is about a 10-minute drive from Abu Dhabi International Airport and 50 minutes from Yas Marina Circuit, which will host the inaugural Abu Dhabi GP later this year.Futuristic Workspace Looks Like a Dinosaur Egg
Do you like to block the world out completely when you're working at your desk? Copenhagen-based design team GamFratesi has created a prototype for a sleek, dinosaur egg-like work environment that they call Rewrite. It reminds me of those cubicles they had at my grad school library, except they're a lot nicer-looking.
Interior Design Tips
Interior Design Tips: Home Decoration with Picture Frames
Read on to find out how to choose the best picture frame for your home decor.
Whether enclosing a precious work of art or a prized family photograph, a picture frame is a design element not to be overlooked. A carefully chosen frame adds to the aesthetics and overall harmony of a well-decorated room, while a bad frame can ruin the entire effect of the artwork.
Before shopping for frames, visit art galleries and museums in your area to see how different frames are used to enhance photographs and paintings. Browse decorating books and magazines to see framed pictures displayed in homes. Next, consider the type of picture and the style in which the room is decorated to determine what type of frame would best fit.
Above all, the frame must complement the image it holds. When searching for a frame, keep in mind the painting or photo and find a frame that will enhance it. For example, an ornate gold frame looks wonderful with a traditional oil painting, while a natural wood frame suits a painting of a lush forest, and a soft blue frame could be used to accentuate a color from the picture it encloses.
The size and shape of the frame also make an impact on the art. A small picture can have greater presence matted in a larger, elaborate frame. A frame with thick sides can also keep a small painting from going unnoticed, while a large painting is often set off to best effect by a plain, thin frame.
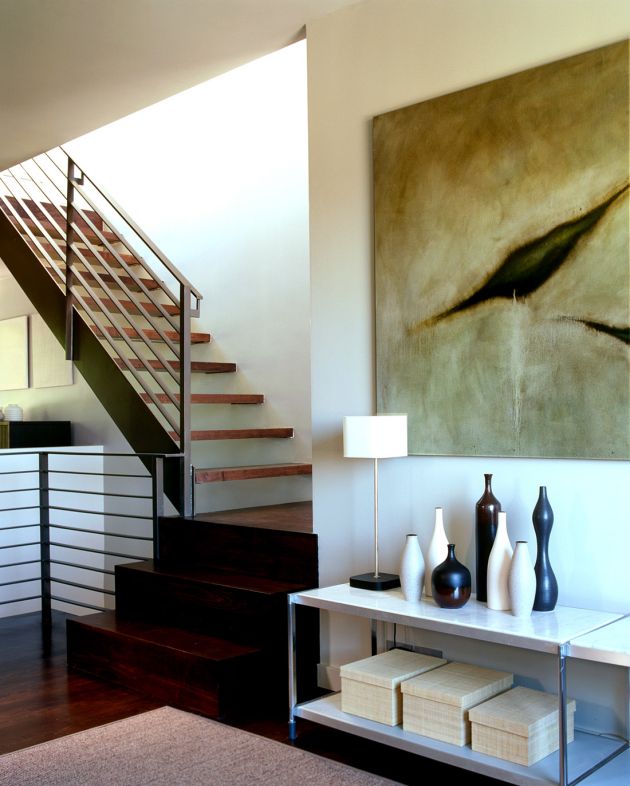
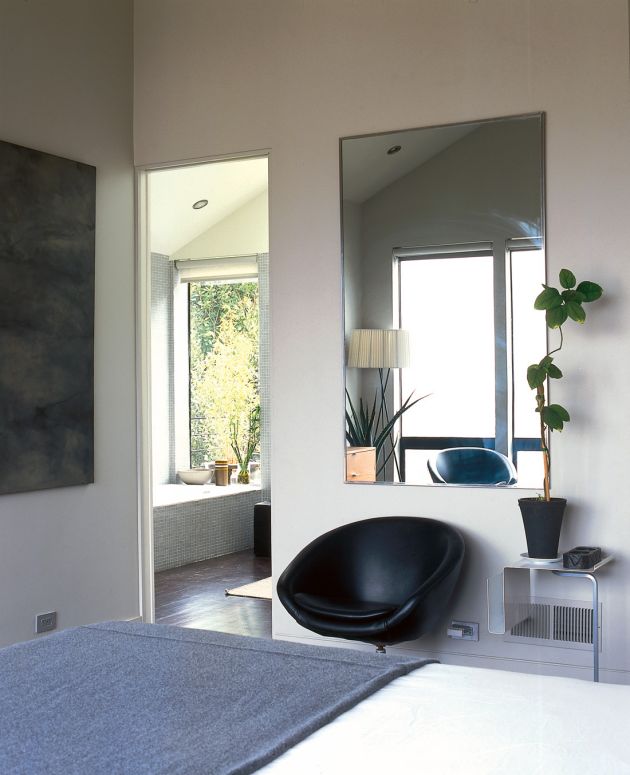
The decorating style and function of the room where the picture will be hung must also be considered when choosing a frame. For a child's bedroom or playroom, frames in primary colors or those featuring cartoon characters often work best. A spare, modern room calls for sleek contemporary frames. Old-fashioned gold colored frames or beautifully carved wood ones complement a traditional home, while simple, natural wood frames look great in rooms decorated in the country style. Also consider the wall where the painting will hang. A white frame against a white wall can get lost, where a green frame will stand out. If the painting will be hung on busy wallpaper, make sure the frame contrasts with the background.
The frame must fit the artwork for which it is meant. If framing an oil painting on stretcher bars, make sure the frame is deep enough to accommodate the bars. If using a metal frame on a large picture, see that it is strong and will not buckle.
If you are hanging a collection of photos or prints together, use similar frames to visually link them. The frames could be all of the same style, or perhaps different shapes and sizes, but all in the same color. These frames should be simple in order to focus attention on the pictures.
You can find photo frames in most home decorating shops, and many arts and crafts supply stores sell frames for paintings and photos. Professional framing shops naturally have a great selection of frames, and the employees, who have handled hundreds of pictures, can offer expert advice for choosing a frame. Alternatively, check out thrift shops for old pictures in great frames. The picture can always be discarded. You can also buy inexpensive wooden frames and spruce them up with paint.
Visit our Design Center
Our mission is to build quality homes & semi custom homes with design, style, and great value while providing our clients with exceptional service while building throughout Appleton, the entire Fox Valley, Oshkosh, and Green Bay area.
Our future rests on the philosophy developed in our past of building quality homes with inovative design, delivered on time, and within budget.
Midwest Design Homes has
earned a reputation for excellence
and is recognized as one of the premier custom and semi custom
home builders in the Fox Valley.
Because we are committed to making the process fun, easy & convenient, we can offer a Turnkey (Turn key) construction program on many of our Semi-Custom Model Homes.
We have designers to walk
you through all of your building selections at no additional costs
to the homeowner. We can help
you make your dreams a reality.
We are committed to quality construction, customer service, customer satisfaction, and a tradition of excellence. And to show our dedication to quality, all our homes
are Energy Star Certified and
Green Built Certified.
http://midwestdesignhomes.com/
Interior Design Tips: How to Decorate Your Interior Without Spending a Cent!
In the current world financial situation, money no longer grows on trees! Did it ever?
Money is a lot harder to come by, people are afraid of losing their jobs, worried about their financial future and less likely to be committing to making major changes to their home interiors, but that doesn't mean we have to sit back and put up with the status quo. We can have fun and change our interiors without having to spend a cent. We just need to get a little creative! Here are some ideas on how you can make your home feel like it has had a makeover without spending a cent.
1. Shift furniture into different rooms, it's amazing how a change of environment can make a piece of furniture look completely different.
2. Rearrange your artwork on the walls, reposition mirrors - these help change the light in your room and depending on where you place them, can make a room feel larger.
http://architectaria.com
Bedroom Design with Minimalist Modern Furniture
Painting a Bathroom
Step 1. You should take off the bathroom with your painters tape. Take the tape around all of the surfaces that you do not wish to be painted. Make sure to tape off the ceiling as well. Press the tape firmly as not to have the paint bleeds.
Step 2. Shake the paint bucket and then stir the paint with the stirrer. Make sure that the paint is completely mixed before you use it. Pour a small amount of paint onto the painters tray. Go ahead and dip the tip of the brush into the paint until completely submerged. Be careful not to get the paint past the brushes bristles.
Step 3. You are now ready to begin to outline the room. This is the most difficult task. Use the smaller paint brush to get close to the ceiling, the toilet, the sink, the shower, and the other areas that you are outlining. Do your best not to touch these surfaces with the brush. If the surface was touched, don't panic. Do your best to remove the paint while it is still wet. After the outlining is finished then you can go over the remaining larger areas with your roller. This will cover more quickly.
Step 4. After the outlining is finished then you can go over the remaining larger areas with your roller. This will cover more quickly. Dip your roller into the paint in the painters tray. Roll the roller until completely covered with paint. Transfer the roller onto the wall from the painters tray.
Step 5. You are now almost finished. Now all that is left is your touch ups. You may want to leave the room and come back with fresh eyes. This way when you walk back into the room you can see if you have missed any areas. Take either your brush or your roller and go over the bare areas. Wait for the paint to dry. Pull off the tape and voila! you have yourself a freshly painted bathroom.
Tips and warning:
- Pay the extra money for brand name paint. It covers better.
- Take the time to take everything off of the walls and ceilings before you get started.
- Wear clothes that can get paint on them.
Best Interior Design on Black and White Mobileffe
Best Extension Interior Design with Glass Wall
Winter Pruning
The growth of plants is at its lowest during the month of December, but that does not mean the garden is inactive. Below the surface, there is a lot going on ... bulbs pushing their noses ever nearer the surface, trees and shrubs making new roots in moist soil, earthworms making compost from leaf litter, and you, looking ahead and making plans!
Now is the time to lift and divide those perennial plants that may have outgrown their space or maybe they aren’t flowering as well as they should be due to overcrowding. Shrubs and trees that are in the wrong place and were screaming to be moved earlier in the year can all be moved during this dormant season.
The late dormant season is best for most pruning. Pruning in late winter, just before spring growth starts, leaves fresh wounds exposed for only a short length of time before new growth begins the wound sealing process. Another advantage of dormant pruning is that it’s easier to make pruning decisions without leaves obscuring plant branch structure. Pruning at the proper time can avoid certain disease and physiological problems.
Reasons for pruning
1. Prune to promote plant health.
- Remove dead or dying branches injured by disease, severe insect infestation, animals, storms, or other adverse mechanical damage.
- Remove branches and branch stubs that rub together.
- Avoid topping trees. Removing large branches leaves stubs that can cause several health problems. It also destroys the plant’s natural shape and promotes suckering and development of weak branch structure.
Encouraging flower and fruit development, maintaining a dense hedge, or maintaining a desired tree form or special garden forms.
3. Prune to improve plant appearance
Appearance in the landscape is essential to a plant’s usefulness. For most landscapes, a plant’s natural form is best. Avoid shearing shrubs into tight geometrical forms that can adversely affect flowering. Alter a plant’s natural form only if it needs to be confined or trained for a specific purpose. When plants are pruned well, it is difficult to see that they have been pruned! Prune to:
control plant size, keep evergreens well-proportioned, or remove unwanted branches, waterspouts, suckers, and undesirable fruiting structures that detract from plant appearance.
4. Prune to protect people and property.
- Remove dead branches.
- Have hazardous trees taken down.
- Prune out weak or narrow-angled tree branches that overhang homes, parking areas, and sidewalks — anyplace falling limbs could injure people or damage property.
- Eliminate branches that interfere with street lights, and overhead wires. REMEMBER, DO NOT attempt to prune near electrical and utility wires. Contact utility companies or city maintenance workers to handle it.
- Prune branches that obscure vision at intersections.
- For security purposes, prune shrubs or tree branches that obscure the entry to your home.
Pruning is really the best preventive maintenance a young plant can receive. It is critical for young trees to be trained to encourage them to develop a strong structure.
Pruning begins at planting time.
- Prune to shape young trees, but don’t cut back the leader.
- Remove crossing branches and branches that grow back towards the centre of the tree.
- As young trees grow, remove lower branches gradually to raise the crown, and remove branches that are too closely spaced on the trunk.
- Remove multiple leaders on evergreens and other trees where a single leader is desirable.
Pruning young shrubs is not as critical as pruning young trees, but take care to use the same principles to encourage good branch structure. - When planting bare root deciduous shrubs, thin out branches for good spacing and prune out any broken, diseased, or crossing/circling roots.
- When planting bare root deciduous shrubs for hedges, prune each plant to within 6 inches of the ground.
- Newly planted shrubs require little pruning if they were container-grown or were dug into a soil ball.
Pruning large established trees
Leave the pruning of large trees to qualified tree care professionals who have the proper equipment. Consider the natural form of large trees whenever possible. Most hardwood trees have rounded crowns that lack a strong leader, and such trees may have many lateral branches.
The three most common types of tree pruning are:
- Crown Thinning-selectively removing branches on young trees throughout the crown. This promotes better form and health by increasing light penetration and air movement. Strong emphasis is on removing weak branches. (Don’t overdo it on mature trees.)
- Crown Raising — removing lower branches on developing or mature trees to allow more clearance above lawns, sidewalks, streets, etc.
- Crown Reduction — removing larger branches at the top of the tree to reduce its height. When done properly, crown reduction pruning is different from topping because branches are removed immediately above lateral branches, leaving no stubs. Crown reduction is the least desirable pruning practice. It should be done only when absolutely necessary.
Proper branch pruningTo shorten a branch or twig, cut it back to a side branch or make the cut about 1/4 inch above the bud.
Always prune above a bud facing the outside of a plant to force the new branch to grow in that direction.
Pruning large branches
To remove large branches, three or four cuts will be necessary to avoid tearing the bark. Make the first cut on the underside of the branch about 18 inches from the trunk. Undercut one-third to one-half way through the branch. Make the second cut an inch further out on the branch; cut until the branch breaks free.
- Before making the final cut severing a branch from the main stem, identify the branch collar. The branch collar grows from the stem tissue around the base of the branch. Make pruning cuts so that only branch tissue (wood on the branch side of the collar) is removed. Be careful to prune just beyond the branch collar, but DON’T leave a stub. If the branch collar is left intact after pruning, the wound will seal more effectively and stem tissue probably will not decay.
- The third cut may be made by cutting down through the branch, severing it. If, during removal, there is a possibility of tearing the bark on the branch underside, make an undercut first and then saw through the branch.
- Research has shown wound dressing is not normally needed on pruning cuts. However, if wounds need to be covered to prevent insect transmission of certain diseases such as oak wilt, use latex rather than oil-based paint.
After the initial pruning at planting, hedges need to be pruned often. Once the hedge reaches the desired height, prune new growth back whenever it grows another 6 to 8 inches. Prune to within 2 inches of the last pruning. Hedges may be pruned twice a year, in spring and again in mid-summer, to keep them dense and attractive. Prune hedges so they’re wider at the base than at the top, to allow all parts to receive sunlight and prevent legginess.
Renewal pruning for older or overgrown shrubs:
Every year remove up to one-third of the oldest, thickest stems or trunks, taking them right down to the ground. This will encourage the growth of new stems from the roots. Once there are no longer any thick, overgrown trunks left, switch to standard pruning as needed.
Pruning Evergreens:
With few exceptions, evergreens (conifers) require little pruning. Different types of evergreens should be pruned according to their varied growth habits.
o Spruces, firs and douglas-firs don’t grow continuously, but can be pruned any time because they have lateral (side) buds that will sprout if the terminal (tip) buds are removed. It’s probably best to prune them in late winter, before growth begins. Some spring pruning, however, is not harmful.
- Pines only put on a single flush of tip growth each spring and then stop growing. Prune before these “candles” of new needles become mature. Pines do not have lateral buds, so removing terminal buds will take away new growing points for that branch. Eventually, this will leave dead stubs.
Pines seldom need pruning, but if you want to promote more dense growth, remove up to two-thirds of the length of newly expanded candles. Don’t prune further back than the current year’s growth. - Arborvitae, junipers, yews, and hemlocks grow continuously throughout the growing season. They can be pruned any time through the middle of summer. Even though these plants will tolerate heavy shearing, their natural form is usually most desirable, so prune only to correct growth defects.
The right tools make pruning easier and help you do a good job. Keeping tools well-maintained and sharp will improve their performance. There are many tools for pruning, but the following will probably suffice for most applications:
- A good pair of pruning shears is probably one of the most important tools. Cuts up to 3/4 inches in diameter may be made with them.
- Lopping shears are similar to pruning shears, but their long handles provide greater leverage needed to cut branches up to 11/2 inches in diameter.
- Hedge shears are meant only for pruning hedges, nothing else. They usually cut succulent or small stems best.
- Hand saws are very important for cutting branches over 1 inch in diameter. Many types of hand saws are available. Special tri-cut or razor tooth pruning saws cut through larger branches — up to 4 inches in diameter — with ease.
- Pole saws allow for extended reach with a long handle, but they must be used carefully as it’s difficult to achieve clean cuts with them.
- Small chain saws are available for use on larger branches. Operators must wear protective clothing and exercise caution when using them. Never use chain saws to reach above your shoulders, or when you are on a ladder.
- Strong pair of gloves. A thick pair of work gloves will help protect your hands from thorns and blades.
Too many young trees are pruned improperly or not pruned at all for several years. By then it may become a major operation to remove bigger branches, and trees may become deformed.
At planting, remove only diseased, dead, or broken branches. Begin training a plant during the dormant season following planting.